K E Y R E S O U R C E S :
p r o t o t y p i n g (link)
• what are we designing?
• examples
• prototype help
• materials and where to buy
• arduino code & coding
• working with the shop (D2FS)
p o s t e r s & v i d e o s (link)
• guide: videos, posters, reports
c o u r s e p o l i c i e s (link)
• my course policies
• consent form for this course
• DEA/HCD statement
c o u r s e c u l t u r e (link)
• design culture
• class organization
• societies, jobs, opportunities
------------------------------------------------
HUMAN CENTERED DESIGN METHODS
01. Mindmapping
02. Cultural Probes
03. Morphological Chart
04. Rapid Prototyping
05. Mood Boards (2)
06. Storyboard
07. Animated GIF
-------------------IDEATION [10 pts]---
08. Scenario
09. Role Play
10. Survey on UX
11. Think-Aloud
12.
Survey using SUS
13. Delphi Method
14. Heuristic Evaluation
15. Efficacy Study
--------POSTER + VIDEO [40 pts]---
------------------------------------------------
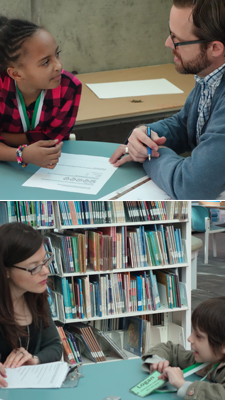
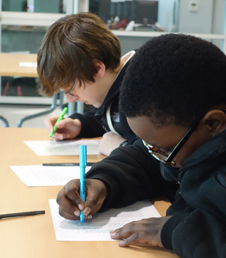 Survey with tweens. Survey with tweens.

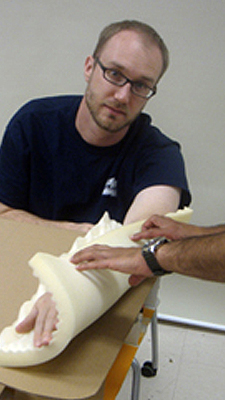
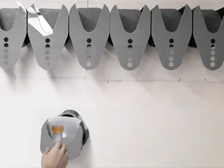
Prototyping in shop.
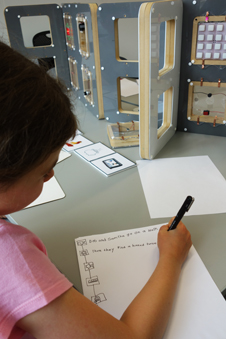
Co-design with child.
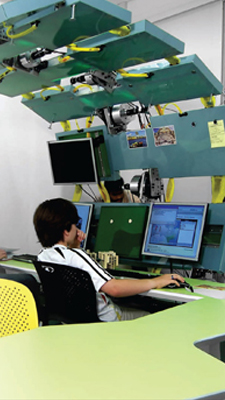 Usability Study. Usability Study.
 Role play. Role play.
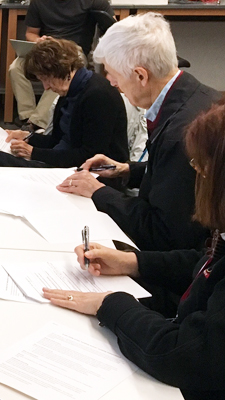
Survey with older adults.
S T U D E N T E X A M P L E S
below, from all of my classes, to share with you what I think is excellent work, broadly. The content of these videos and reports may not apply to the specific design challenge for your course. Consider carefully what you need to do for your course in your semester!
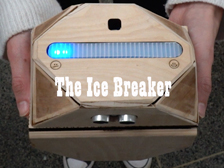
The Ice Breaker [video] [doc]

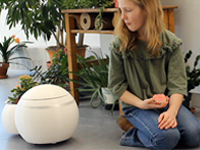
anima [video] [poster]

infinity wonder box [video] [doc]

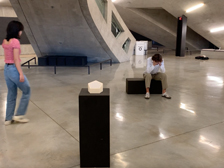
invisible stations [video] [doc]
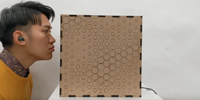
hexagonal cube [video] [doc]

george [video]

SIT [video] [doc]
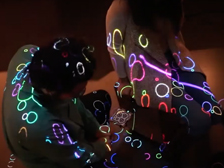
SoundSoul [video]
haptic desk [video] [doc]

ehoura for the ISS [video] [doc]

voyager box [video] [doc]
Growbot [video] [pub] BEST DEMO

e-MoBo [video] [pub] BEST PAPER
SocialStools [video]
SORT [video]

pheB [video]
Axis [video] [doc]
|
 |
Human-Centered Design Methods
Keith Evan Green, RA, PhD > w h e e l o f n a m e s
TA: x, xxxx@cornell.edu to select work to review + 2 critics
Tu. & Th., 10:10-11:25am, HEB 2L32
C O U R S E D E S C R I P T I O N | D E A 2 7 3 0
This course explores the use of design methods to generate ideas and evaluate designed objects and environments. Lectures cultivate an understanding of the various methods, while hands-on activities provide opportunities to apply these methods to the design of a small device and its interactions with people and things.
(No prior coding or electronics experience is necessary to do well in this course.)
P R E R E Q U I S I T E S | E N R O L L M E N T
• Enrollment is limited to 22 students to make full use of the D2FS shop and staff.
• Prerequisites: DEA 1101, DEA 1150 or DEA 1140, and DEA 1500 with min. of B-.
• DEA majors are auto-enrolled. Non-majors require instructor's permission by email.
• 3 credits. No final exam. For letter grade only (no Pass/Fail or auditing).
S Y L L A B U S | S E E A L S O M Y D E A 5 2 1 0 & D E A 6 2 1 0
I N T R O D U C T I O N - - - - - - - - - - - - - - - - - - - - - - - - - - - - - - - - - - - - - - - - - - -
Human-Centered Design Methods are used to design not just things, but also the interactions between those things and the people who use or inhabit them. As such, Human-Centered Design is not only about form-making but also an attentiveness to the needs and opportunities of people and the planet, striving to improve lives, enhance existing places, and support interactions of human and other living beings in their surroundings.
This course focuses on designing interactive devices (more from MAKE and Instructables) given that interactive devices are growing in number, kind, and complexity and have promise for supporting and augmenting human lives.
Designers use human-centered design methods for different forms of design: industrial and product design, healthcare design, retail design, interaction design (IxD), user experience design (UX), human-computer interaction (HCI), and mechanical engineering. By focusing on people, human-centered design methods help us craft meaningful solutions while also offering insights into who we are, how we relate to the world, and what our place is within it.
"In order to understand things, we have to build them."
– Ruzena Bajcsy, a founder of modern robotics.
T H E P O W E R O F A S M A L L C L A S S - - - - - - - - - - - - - - - - - - - - - - - -
Unlike a large lecture class at Cornell, this small class offers a unique opportunity for meaningful conversation, discovery, and collaboration. Don’t miss out on this chance to engage! To ensure attendance, a sign-in sheet will be available during the first ten minutes of each session. Additionally, a significant portion of your grade will be based on your active participation in collaborative learning and discovery.
W H A T T O D O F I R S T - - - - - - - - - - - - - - - - - - - - - - - - - - - - - - - - - - - - - - -
N O D E V I C E S P O L I C Y - - - - - - - - - - - - - - - - - - - - - - - - - - - - - - - - - - - - -
The use of phones, tablets, and laptops is prohibited in class except for class activity focused on Arduino prototyping when laptop-use is required. Leave your mobile phones in your backpacks and be with us; you'll be more engaged and do better in this course. The evidence for this is clear. If you have an exceptional need for using these devices in class, please come talk to me about it.
L E A R N I N G O U T C O M E S - - - - - - - - - - - - - - - - - - - - - - - - - - - - - - - - - - - -
Three learning outcomes are expected of this course:
Outcome 1. To develop an understanding of how and which design methods can be applied in the iterative design process.
Outcome 2. To demonstrate the ability to develop and evaluate design prototypes responsive to the challenges and opportunities of supporting and augmenting life on our planet.
Outcome 3. To communicate a design process in a research poster and video that satisfy requirements of benchmark, design-research conferences.
R E Q U I R E D B O O K - - - - - - - - - - - - - - - - - - - - - - - - - - - - - - - - - - - - - - - - - -
You are required to purchase one inexpensive book for this class:
The Pocket Universal Methods of Design: 100 Ways to Research Complex Problems,available from the Cornell Bookstore and from Amazon. Do not purchase the similarly titled, Pocket Universal Principles of Design: 150....
Read assigned readings ahead of each class session as per the SCHEDULE below. The Pocket Universal Methods book is assigned by method number (e.g., 01, 16); shorter readings (from various sources) are linked.
D E S I G N C H A L L E N G E - - - - - - - - - - - - - - - - - - - - - - - - - - - - - - - - - - - - - -
Design an Interactive Device for Repairing a Relationship: "Let's Talk."
Imagine you are part of a design firm tasked with creating an interactive device housed within a rectangular, translucent box, which will contain all the necessary electronics, including a rechargeable battery. The materials for this project will be limited to those provided by the firm’s lead designer (i.e., the materials supplied in class).
This device is intended to help repair and strengthen relationships between two people who are experiencing tension, misunderstanding, or emotional distance. Through a combination of colors, sounds, movements, and sensor-driven interactions, your design should create a shared, collaborative experience that encourages both individuals to engage with each other rather than avoiding difficult conversations.
Your primary goal is to address the growing tendency for people to use technology and digital distractions to avoid addressing interpersonal conflicts. By requiring both people to interact with the device simultaneously and with each other, your design should break down barriers, create moments of vulnerability, and foster genuine connection during challenging relationship moments.
Scenario:
Two roommates, close friends, or romantic partners have been experiencing tension—perhaps due to a misunderstanding, conflicting schedules, different life pressures, or simply the accumulated stress of daily life. Instead of addressing the issue directly, they've been avoiding each other, communicating through texts rather than face-to-face conversation, or engaging in superficial interactions that don't resolve the underlying problem.
Friend-1 approaches Friend-2 with your device, saying "I think we should talk, but I don't know how to start." The device creates a structured interaction that requires both people to be present and take turns engaging—it won't complete its full sequence unless both individuals participate. Through a combination of sensor inputs that require turn-based collaboration (such as one person approaching the device while the other waits nearby, taking turns making gestures or pressing switches, or coordinating their movements in sequence), the device guides them through a series of interactive moments designed to break down walls and encourage authentic communication.
The device should start with simple, playful, turn-based interactions that build trust and comfort, then gradually encourage deeper engagement. Consider how the progression of interactions might create opportunities for shared focus, mutual attention, and moments of vulnerability that naturally lead to conversation. The goal is not to solve their specific conflict through the device itself, but to create the conditions—shared presence, turn-based engagement, and focused attention on each other rather than screens—that make genuine conversation possible.
Key Design Components:
1. Interactivity: The device will be triggered by a set of sensors that detect specific interactions. These sensors include:
• Proximity: Moving closer or farther from the device (ultrasonic sensor).
• Rotation: Rotating the device (3-axis accelerometer).
• Gestures: Making gestures with the device (gesture sensor).
• Sound: Blowing on the device or making noise near it (sound sensor).
• Manual Control: Adjusting a dial or knob of any shape (potentiometer).
• Light Exposure: Covering or exposing the device to light (light sensor).
• Pressure: Pressing against the device or resting an object on it (button sensor).
•
Environmental Changes: Altering temperature, humidity, or airflow (temperature and humidity sensors).
The designer's role is to select and test the sensors that that create meaningful turn-based collaboration between both people, designing interactions that require both individuals to be present and engaged in sequence. These interactions should build from simple coordination to more meaningful shared experiences, with the device only completing its full response when both people have participated.
2. Emotional Output:
• Color and intensity: Controlled by LEDs.
• Physical movements: Produced by a servo motor.
• Sounds: Generated either by a buzzer or by attachments to the servo motor that strike a surface.
Design Process:
1: Defining Emotional Goals
Begin by defining the relational goals for your device. What kind of connection are you hoping to facilitate? Do you want the device to create moments of playfulness that reduce tension? Build trust through shared vulnerability? Encourage empathy and understanding? Consider how the progression of interactions might mirror the process of relationship repair—starting with safety and comfort, building trust, creating openness to communication. Explore concepts of emotional design (e.g., Norman's Emotional Design or Desmet's theories on emotion in interaction design) to help guide your thinking. (Listen to this podcast where these concepts are considered.)
2: Turn-Based Collaborative Interaction & Progressive Engagement
Create a sequence of turn-based collaborative interactions that build in complexity and intimacy:
- Choose sensor combinations that create meaningful turn-based participation from both people. For example, the device might activate when Person A approaches (ultrasonic sensor detects proximity), prompt them to make a gesture (gesture sensor) or press a switch, then use lights or servo movement to signal that it's Person B's turn to approach and respond. The device only completes its full sequence—perhaps a beautiful light pattern or meaningful sound—when both people have participated in turn.
- Develop a progression from simple turn-based coordination to more meaningful sequential interaction. Early interactions might be straightforward call-and-response (Person A waves, device responds, Person B waves, device completes the pattern), while later stages might require more sustained engagement (both people must remain in proximity while taking turns, or the servo motor creates a physical element that requires both people to interact with in sequence).
3: User Testing & Iteration
Test how different turn-based requirements affect comfort level and willingness to engage. Does requiring people to stay close to each other while taking turns create appropriate intimacy? Do the physical interactions encourage them to focus on each other rather than the device itself?
Conduct user studies to test how effectively the device facilitates genuine connection between people experiencing relationship tension. This will inform your design decisions and help you iterate on your initial ideas.
Test with pairs of people who are willing to role-play a conflict scenario, observing how the turn-based collaborative interactions affect their willingness to engage with each other, their comfort level, and their openness to conversation after using the device.
Both participants will provide feedback on whether the turn-based interactions felt meaningful, whether the device helped them feel more connected, and whether it created conditions that made them more willing to have difficult conversations. Pay particular attention to whether the sequential nature of the interaction helped them focus on each other's responses and presence.
Iteration: Based on user feedback, adjust the sequence of turn-based interactions, the timing between turns, and the rewards for completing collaborative sequences to ensure the device effectively bridges interpersonal distance without feeling mechanical or forced.
4: Design Evaluation
Before beginning the user testing phase, define clear criteria for evaluating your design:
- Turn-Based Collaborative Engagement: How effectively does the device create meaningful turn-based participation from both people? Do users feel that the sequential interactions require them to pay attention to each other, and does this collaboration feel natural rather than forced?
- Barrier Reduction: How well does the device help people move past avoidance behaviors and create willingness to engage in face-to-face interaction? Does it successfully "break the ice" in situations where people have been avoiding each other?
- Sequential Physical Interaction: How intuitive and meaningful are the turn-based sensor interactions? Do the required interactions create appropriate levels of engagement and shared focus for relationship repair? Does the device create a progression that encourages both people to remain present with each other throughout the interaction sequence?
As you develop this device, your goal is not to solve conflicts directly, but to create the conditions that make authentic human connection and communication possible. Through careful design of turn-based collaborative interactions, the device should help people move past digital avoidance patterns and engage with each other in the physical, emotional present moment.
The Bigger Picture.
1: The Box Enclosure
The kind of artifact you are striving for is small in scale, whimsical/poetic, beautifully fabricated (in hi-fidelity), interactive using the Grove kit (with at least one input and one output), and meaningful and purposeful. Initially, you will construct your box enclosure from the corrugated plastic panels provided in class and two variants of the same material, similar in size. If you wish to cut-out or engrave the surfaces of the panels, and when making the two variant boxes, work with our partners in the D2FS on laser-cutting panels to-size from digital files you generate using CaseMaker.
2: The Finishing of the Boxes
Your finished product must not have ink-pen writing or coloring on it, or use craft materials like cotton balls or craft paper: any inscriptions should be subtracted by laser-cutter engraving, and color should come from the LED stick provided. You are permitted (and even encouraged) to cut material away from the panels by laser-cutter or by mat knife. You may also add to your box other features, perhaps 3D printed, that are meticulously fabricated and purposeful. The battery pack provided must go inside your box with all your electronics; design an elegant way for users to recharge the device. Don't make the mistake of creating a prototype that is not meticulously designed and fabricated; prototypes that look like craft projects created by a child will be graded accordingly.
3: Coding for Interactivity
You do not have to generate code on your own: you can select one of the codes provided under the heading below, “Arduino Codes You Can Copy & Paste.” (An effective way to tailor your code to your wants without coding experience is to use ChatGPT as described below.)
4: Intellectually, ...
Intellectually, your design may take inspiration from the design research area of affective computing—the study of how interactive devices can recognize, interpret, and respond to human emotions (see Roz Picard's foundational paper on affective computing).
5: Respect Design Constraints, ...
Limit yourself to using only the Grove electronics and box panels provided. To satisfy the targeted sales price of this product for the identified market, the client expects you to design with the electronics and box provided or a box you fabricate of similar volume, made from the same material.
"Design is the process of creating solutions within constraints."
– Chris Bangle, former Chief of Design at BMW.
6: Three Design Pitches
To explore the viability of this new product, the client asks you to pitch the design three times: once (in a week’s time) to present your earliest, quick effort to generate a fully-working device, a second time in the middle of your design process to present your concept, and a third time at our last class session to "sell" your design to your audience: Cornell students (in class).
Q&A (to see if you understood the assignment described above):
Q: Do I have to use the electronics? Can't I just make a box without them?
A: You must use the electronics provided. Your client wants an interactive device that has one input (i.e., one sensor) and at least one output (LED lighting, movement, and/or sound).
Q: Can I purchase more and different electronics?
A: No, you must use the electronics provided. Your client understands the price point of the device for the marketplace; adding more cost is not permitted.
Q: Can I decorate my box by coloring it with a pen or adding craft paper or images?
A: No. Your prototype should look like a manufactured product, not a craft project. It is translucent corrugated plastic with electronics. No coloring, craft paper, printed images, cotton balls, .... You are a designer: make something magic with these means.
Q: How careful do I need to be in making the prototype?
A: Very careful. Your prototype should look like a manufactured product.
Q: Do I need to fit the battery in the box and have an easy way to recharge it.
A: Yes, the battery is inside the box and must be accessible for recharging.
S C H E D U L E - - - - - - - - - - - - - - - - - - - - - - - - - - - - - - - - - - - - - - - - - - - - - - - - - -
CASE STUDY VIDEOS (e.g., ACM Demos) are screened at the start of most classes.
READ assigned readings for a given class session BEFORE that class.
DRAFT ASSIGNMENTS (beginning with "Mind Maps") are done AFTER the class session that considers the topic (e.g., "Mind Maps"), and are uploaded to our shared Box folder BEFORE the NEXT class session (except, in a few instances specified below and in class where you upload after TWO classes (e.g., "Cultural Probe").
EVERYTHING YOU DO FOR THIS COURSE but for the exam (done in class) and the certificate of completion for the IRB course (emailed to TA) is uploaded to our shared Box folder by the dates specified.
LECTURE SLIDES are not shared. Come to class, read the short, assigned readings, become familiar with the methods of human centered design, learn and explore by doing and sharing with us.
IN-CLASS CRITIQUES OF ASSIGNMENTS: Each student will upload to the shared class folders evidence of completing the many class session assignments. This means that if the class topic is, "Mind Maps," you will upload your Mind Maps to the folder labeled "Mind Maps" before the next class session. At the next class session, student names will be selected randomly and the Mind Maps of students selected will be considered in class but two critics-of-the-day, also selected randomly. This is a critical aspect of this course: we learn from each other!
BRING A LAPTOP AND GROVE KIT TO CLASS, ALWAYS!
08.26 | 01 Grove-Arduino Workshop
> IN-CLASS:
•
Students will get a Grove Kit "bag" and the plastic panels to make a box.
• Instructors will introduce
Grove with this video; 10 Grove Modules, and my slides.
• Students download Arduino (more help); explore Grove; try 5th example in my slides.
08.28 | 02 D2FS Shop Training (Come dressed with closed shoes. No sandals!)
> READ: Yale News on the Loneliness Epidemic and how we might design for it;
>
VIEW: Materials under WHAT TO DO FIRST above.
> IN-CLASS: D2FS Shop Training; Intro to our Design Challenge and to MindMaps.
09.02 | 03 Course Organization; Intro to HCD; Mind Mapping
> READ: Design Cycle; 56; MindMap.
>
LISTEN TO: this podcast on emotion design.
> FOR NEXT CLASS: create & upload 2 MindMaps for this Design Challenge.
09.04 | 04 Rapid Prototyping
> READ: 11, 53; Prototyping; WOz; Nest; Paper•Mech; Mechanisms; ex. mechanism.
> IN-CLASS: Review this course webpage; read Bruce Mau: An Incomplete Manifesto.
> IN-CLASS: Review some of your MindMaps. Do they capture your deepest thinking?
> FOR NEXT CLASS: upload a video (30 seconds?) capturing your first working Grove prototype in the provided box addressing this Design Challenge (example video). You may want to use painter's tape to hold the box together so you can later re-use it. Find inspiration here: ACM Demo Hour, MAKE, and Instructables.
> LOOKING AHEAD TO DESIGN PITCH-1 (see below for due date): you will pitch your concept with a more refined protytpe informed by what you learn in the next classes.
09.09 | 05 Cultural Probes; Introduction to IRB
> READ: 24. Gaver, Cultural Probes; Problem Definition; Requirements.
> IN-CLASS: review IRB application and parental consent form.
> IN-CLASS: review some of your first videos.
> ACTIVITY upload in 1 week a pdf of 3 slides: 1. photos of your probe, 2. photos of how 5 participants completed the probe; 3. a completed What did I learn? slide.
09.11 | 06 Research through Design [RtD]
> READ: 70. RtD; YouTube on RtD; Frayling RtD; Zimmerman RtD; Lit Review.
> IN-CLASS: look at posters 1, 2; from DEA 2730: 3, 4, 5, 6; and useful (free) apps: Figma (for digital designing) and Miro (for online whiteboarding).
> FOR NEXT CLASS: upload a
literature review of 3 papers from the ACM DL related to our design challenge -- use ACM cit format; & remember to upload cultural probes!
09.16 | 07 Morphological Charts
> READ: 36; Morphological Chart: 1, 2, student example from class, & worksheet.
> IN-CLASS: review some of your cultural probes and (as time permits) lit reviews.
> ACTIVITY:
1. Ideate with a morphological chart with a worksheet.; upload it for next class review.
2. Select 3 pathways of cells to generate 3 alternative prototypes (3 different boxes).
3.
Construct these boxes and embed the electronics in each of them, one at a time.
4. Video record each of these for DESIGN PITCH-1.
09.18 | 08 Grounding Design in Context: Ethnography, Observation, Triangulation
> READ: 42; 57; 59; 61; 91; Observations; Perec's Observational Experiments.
> IN-CLASS: review some of your morphological charts.
> ACTIVITY: keep working on your 3 alternative prototypes (as above and below).
09.23 | 09 Pitching Your Design to an Audience with a Pitch Deck (i.e., slides)
> IN-CLASS: How to pitch a compelling vision; learning from Steve Jobs; Pitch Decks.
> FOR NEXT CLASS: prepare/upload the 3 slides & prepare your pitch.
09.25 | 10 DESIGN PITCH-1: Grove demo [DUE IN CLASS, 5pts]
> IN-CLASS: a 2-minute pitch to the client (the class) using 3 slides:
Slide 1: name & logo for your design; best image of it with stakeholder(s) (10 sec.).
Slide 2: auto-play loop 3 videos of 3 physical prototypes from morph. chart (50 sec.).
Slide 3: one of the three videos - the one you think is best. Why? (60 sec.)
Upload your 3-slide presentation by 8am the day of the pitch: directions to do so.
09.30 | 11 Mood Boards
> READ: 14; 47; 66; 99; Mood boards.
> IN-CLASS: review videos by students in my courses (left column on this webpage).
> ACTIVITY: create two mood boards: the mood before & the mood after interaction.
Upload: [a] a slide with your 2 mood boards; [b] a What did I learn? slide.
10.02 | 12 Storyboards
> READ: 58; 82; Storyboard (more; example from cinema).
> IN-CLASS: review some of your mood boards.
> ACTIVITY: ideate and user study a storyboard (ex. 1); upload it with What did I learn?
10.07 | 13 Prototyping with GIFs
> VIEW: PBS on GIF; GIF by Photoshop; GIF by Figma & Gif Maker; ex. 1, 2, 3, 4, 5, 6.
> IN-CLASS: review some of your storyboards.
> ACTIVITY: create a GIF; embed it into your draft IDEATION slides for next class.
10.09 | 14 In-class critique of draft IDEATION slides [not graded]
> IN-CLASS: we will review selected students' draft IDEATION slides.
> FOR NEXT CLASS: upload your IDEATION slides for grading.
10.14 | Break No Class
10.16 | 15 Scenarios and Role Playing [DUE: IDEATION, 10pts]
> READ: 71; 72; 73; 84; Scenario (more); Scenario-Based Design; Role Playing [video]
> ACTIVITY: draft a scenario, ex.1; video record your role-play based on the scenario; upload: [a] a slide with your scenario and the link to a Vimeo/YouTube URL for the role-play video or an embedded video file (ex.1, 2), [b] a What did I learn? slide, [c] a slide with a photo (or two) of your current prototype informed by these changes.
- - Oct. 20 Drop deadline. Your design concept should be set; refine details hereon - -
10.21 | 16 Designing User Studies (with focus on UX Surveys)
> READ: 23; 97; 67; 83; Surveys; Qualtrics.
> ACTIVITY: generate a survey focused on user response to design alternatives. Your survey should include 8 Likert-scale questions and 2 open-response questions. At least one Likert-scale question must be posited in the negative as considered in class. Use Google Forms (help) for your survey. Upload slides with screen shots of your survey form for our next class.
> IN-CLASS: review selected students' Scenarios and Role Plays.
10.23 | 17 Conducting, Anaylzing, Reporting User Studies
> READ: Tool to calculate sample size; Methods Compared; how to score surveys.
> ACTIVITY: conduct your study with 5 participants: have them interact with your prototype(s) and complete your survey; upload: [a] slides with your survey questions, responses from 5 participants, and your bar charts. [b] a What did I learn? slide.
> IN-CLASS: review selected students' survey questions (not yet the survey results).
10.28 | 18 Think-Alouds and Coding Them
> READ: 13; 46; 87; Think Aloud; Coding Manual; Thematic Analysis; Coding (video).
> ACTIVITY upload in 1 week: perform a Think-Aloud with 5 participants; code your transcripts informed by The Coding Manual. Complete/upload [a] meaningful segments from the transcripts, coded on slides; [b] a What did I learn? slide.
> IN-CLASS: review selected students' survey results and What did you learn? slides.
10.30 | 19 Usability Studies & SUS Surveys
> READ: 93; 94; Usability Studies; SUS; how to score surveys & calculate SD.
> ACTIVITY: perform a Systems Usability Score (SUS) survey (my version) with 5 participants; calculate an SUS score for each participant; calculate the mean of the 5 scores and their standard deviation; upload for 22: Delphi Method: [1] a slide with your 5 SUS scores, their mean, and their standard deviation; [b] a What did I learn?.
11.04 | 20 Heuristics & Heuristic Evaluations
> READ: Heuristic Evaluation; Nielsen' overview, How to conduct one (- but we won't).
> IN-CLASS: review selected students' Think-Aloud activity and What did you learn?
11.06 | 21 DESIGN PITCH-2: Working Prototype [DUE IN CLASS, 5pts]
> IN-CLASS: 2-minute pitch to the client (the class). Demo your working prototype while conveying to us how your design solves the real problem of feeling disconnected from a friend or loved one at a distance. Upload your pitch deck slides by 8am the day of the pitch: directions to do so.
11.11 | 22 Delphi Method, Pre-Post Testing, Quasi-Experiments
> READ: The Delphi Method. (We won't do a Delphi study.)
> IN-CLASS: review selected students' SUS survey outcomes and What did you learn?
11.13 | 23 [No lecture] [EXAM, 20pts]
11.18 | 24 Efficacy Study; High-Fidelity Prototyping
> READ: How to assess efficacy. (We won't do an Efficacy Study.)
11.20 | 25 Design Methods in Design Practices
> READ: The IxDA (Interaction Design Association) webpages.
> ACTIVITY: meet a guest from ...
> ONLINE: complete an online course evaluation.
11.25 | 26 Showcase of Draft Posters and Videos [DUE: IRB CERTIFICATE, 5pts]
> BEFORE CLASS: upload a URL for your draft video + your draft poster pdf.
> IN-CLASS: review examples of award-winning graphic design to help with posters.
> IN-CLASS: review draft posters and videos.
> BEFORE NEXT CLASS: prepare and upload to our shared folder a pitch deck of 5 slides that support your 4-minute, in-class pitch during our final two classes.
11/27 | Break No Class
12.02 | 27 DESIGN PITCH-3: Final Demo, Day-1 [DUE IN CLASS, 5pts]
> BRING TO CLASS: your working prototype. It will be graded in-class when you "demo" it as part of your 4-minute pitch.
> IN-CLASS: Half of the class will pitch their designs, one-by-one, in 4 minutes, in front of the class. In the unlikely event you have an excused absence for both Demo days, upload a doc. with a URL to a YouTube or Vimeo movie showing you giving this same presentation, for grading.
Upload your pitch deck slides by 8am the day of your pitch: directions to do so.
12.04 | 28 DESIGN PITCH-3: Final Demo, Day-1) [DUE IN CLASS, 5pts]
> BRING TO CLASS: your working prototype. It will be graded in-class when you "demo" it as part of your 4-minute pitch.
> IN-CLASS: Half of the class will pitch their designs, one-by-one, in 4 minutes, in front of the class. In the unlikely event you have an excused absence for both Demo days, upload a doc. with a URL to a YouTube or Vimeo movie showing you giving this same presentation, for grading.
Upload your pitch deck slides by 8am the day of your pitch: directions to do so.
12.16 | 4:30pm | DEADLINE: POSTER and VIDEO, uploaded for final grading:
(a) [My Name]-Poster.pdf < 15MB
(b) [My Name]-Video.doc - simply paste the URL for your Vimeo or YouTube video.
(c) [My Name]-Video.mp4 < 30MB using Handbrake (free app to reduce file size.
This deadline s the date/time specified in October by Cornell Registrar.
Your grades are based on what we find from you in our shared folder at the deadline.
G R A D I N G / S E E G R A D I N G R U B R I C S B E L O W - - - - - - - - - - - -
Please review carefully the Course Policies (link). These policies are not negotiable except under grave circumstances.
Assignments are individual efforts; however, in class, you will be viewing the work of peers and sharing your own work to inform one another. In this way, DEA 2730 is a “conversation” across students, professor, and TA during which you will have ample opportunity to learn and receive feedback on your work.
The list that follows names and describes the graded components for this course. Each component is worth so many points, as shown in red type. The sum of all of these components equals the final grade of 100 points. The numerical scale for grading is as follows: A+ (98–100), A (93–97), A- (90–92), B+ (88–89), B (83–87), B- (80–82), C+ (78–79), C (73–77), C- (70–72), D+ (68–69), D (65–67), D- (below 65).
• 10 points | ATTENDANCE + PARTICIPATION
DEA 2730 is designed as a low-enrollment, interactive experience that values each student’s active contribution. Your participation in discussions, critiques, and collaborative activities is central to the learning process and contributes significantly to your final grade.
Active participation requires being present, prepared, and engaged when called upon. Attendance will be taken through an exit ticket completed in the final few minutes of each class—a brief response to a key concept from that day's lecture that you hand to the TA before leaving. The TA will also maintain a record of your participation quality, especially when your work is reviewed or when you are selected as one of the "critics-of-the-day." Your participation grade will be negatively impacted by repeated unexcused absences, unresponsiveness in class, and persistent distraction from phones, devices, or off-topic conversations. The 10 points will be awarded at the joint discretion of the instructor and teaching assistant. For a description of what constitutes active participation, Review "P1" of the course policies (link).
• 5 points | IRB CERTIFICATE of completion of training on studies with humans.
From this Cornell IRB link, on the linked page, select this required IRB training by:
1.
clicking on the blue box, "TAKE CITI TRAINING (CORNELL LOG-IN)
2. entering your credentials (email address, ....)
3.
selecting, as your role, from the pull-down menu "Student Researcher - Undergraduate"
4. selecting, as the course you plan to take, from the pull-down menu, "Basic Human Subjects – Social & Behavioral Focus."
After finishing the course, email the certificate of completion you receive to the TA before the due date shown in the SCHEDULE above. Failure to complete this task or late submission results in a zero grade for this component of the course. No excuse.
• 5 points | DESIGN PITCH-1 (3 working alternatives) [Rubric]
Pitch to the "studio heads" and "the clients (i.e., the instructors and peers in class) your first presentation of your design concept, using 3 slides:
Slide 1: name & logo for your design; best image of it with a stakeholder (10 sec.).
Slide 2: auto-play loop 3 videos of 3 physical prototypes from morph. chart (50 sec.).
Slide 3: auto-play loop the best video of the 3. Why is this one the best? (60 sec.)
Your videos will show 3 different working prototypes (i.e., 3 boxes) that convey an emotion from a friend or family member (at a geographical distance) to a student (on the Cornell campus-the "stakeholder" in your best image). Each prototype will have at least 1 sensor and 1 actuator from the Grove kit. You will need to assemble the Grove components to make a system for the first box, video record it working, and then disassemble/reassemble the Grove components to use for the second box, record it working, and repeat the same for the third box.
Grading is simple (see Rubric); you earn:
- 5 points if your 3 slides capture everything described above in a compelling way and you make a great pitch for your concept.
- 3 points if you did the assignment, but you failed to include one or more of the above requirements or the presentation slides and pitch were lack-luster (i.e., it was evident that you invested very little of yourself in using this assignment as a means of design discovery and/or you conveyed insufficient persuasion and passion in presenting your concept—even after our class sessions dedicated to design discovery and pitching).
- 0 points if you failed to present and/or submit a presentation.
Ahead of the demo: Upload your 3-slide presentation to ourBox folder by 8am the day of the pitch: directions to do so. In the unlikely event you have an excused absence for the Pitch day, also upload to our shared folder a Word doc. with a URL to a YouTube or Vimeo movie showing you delivering the pitch.
• 10 points | IDEATION [Rubric]
Upload by the due date above in SCHEDULE: 1 PowerPoint file with collected slides of only your best example of each ideation strategy, 01-07. (See the upper-left of this webpage for the list of these). Advice to expedite this: duplicate your PowerPoint file for your DESIGN PITCH-1—this is your 04. Rapid Prototyping—and add the other strategy slides to this: 01-03 before 04 and 05-07 after 04. Name your file [My Name]-Ideation. Your last slide should be for 07, your animated GIF embedded in the slide—it should play automatically. After each ideation strategy slide(s) that required it, don't forget to include your What did I learn? slide (as assigned above in our weekly schedule).
For IDEATION, we are looking for your capacity to:
1. use each method
2. present it in a captivating way (the way designers do), and
3. gain
insights that advances your design (with evidence of your design changing).
Review the Rubric. A grade of "A" for this assignment means that your work is so accomplished that I will use it as an example for next year's class.
• 5 points | DESIGN PITCH-2 (a more refined design) [Rubric]
In a 2-minute pitch, demonstrate that you have a more refined working prototype that meets the requirements of the Design Challenge. Grading is simple (see Rubric); you earn:
- 5 points if you demo for us, in class, a complete, physical prototype with a fully-functioning, interactive Grove system (i.e., at least one input and one output).
- 3 points if you demo for us, in class, a partly-finished, physical prototype or a partly-functioning Grove system.
- 0 points of you fail to present a physical prototype in class.
Ahead of the demo: Upload your pitch deck (slides) to our shared Box folder by 8am the day of the pitch: directions to do so. In the unlikely event you have an excused absence for the Pitch day, also upload to our shared folder a Word doc. with a URL to a YouTube or Vimeo movie showing you delivering the pitch.
• 20 points | EXAM on key terms, names, numbers, and case studies from this course. Anything presented, discussed, assigned, and reviewed through the last class session prior to the the exam date may be examined. (NOTE: I do not share my lecture slides. If you miss a class, ask a classmate for notes.) For the exam, you will be provided a word bank (that includes, e.g., focus group) from which you select and enter the word that best completes the sentences (e.g., A _________is a kind of interview that that brings together a number of people in a room to provide feedback regarding a product). To answer this example, you would select from the word bank and enter focus group. If you need to make-up the exam due to an excused absence, the make-up exam will be an essay format, proctored by the TA, where you will be offered key terms, names, numbers, and case studies; you will be asked to define them, compare/contrast them, and/or provide a practical examples of them in a written narrative completed in the time offered students who took the exam as scheduled.
• 5 points | DESIGN PITCH-3 (final prototype) during final class sessions [Rubric]
You will graded on the demonstration, in class, of your physical, interactive prototype with embedded, functioning Grove electronics. Show us something that works! Grading is simple (see Rubric); you earn:
- 5 points if you demo for us, in class, a complete, physical prototype with a fully-functioning, interactive Grove system (i.e., at least one input and one output).
- 3 points if you demo for us, in class, a partly-finished, physical prototype or a partly-functioning Grove system.
- 0 points of you fail to present a physical prototype in class.
The demonstration of your working prototype will be the key component of your 4-minute pitch, delivered in class, aimed at "selling us" on your design, as if we were your clients or your investors. TIP: Speak more words than you show in slides. Slides should have very few words and figures.
To support your pitch, you will prepare and upload to our shared folder a pitch deck of no more than 5 slides that will help you present: [a] the problem you’re addressing; [b] how you're addressing it; [c] what the experience is; [d] why it's important; [e] why we want it - in 4 minutes! In preparing these slides, this webpage might be helpful. Upload your slide file as [your name]_presentation.pdf.
Ahead of the demo: Upload your pitch deck (slides) to our shared Box folder by 8am the day of the pitch: directions to do so. In the unlikely event you have an excused absence for the Pitch days, upload to our shared folder a Word doc. with a URL to a YouTube or Vimeo movie showing you giving this same presentation. Your Word .doc must be uploaded by the due date for final deliverables for this course (i.e., our Poster and Video) as set by the Cornell registrar (see date above). Given that you will have extra time to complete this assignment, the grading of your demo will be more rigorous to be fair to your peers that presented their demos in class more than two weeks earlier.
• 20 points | POSTER | Ex.s 1, 2; from DEA 2730: 3, 4, 5, 6; the poster is 30" wide x 40" tall. Example posters may not satisfy all the requirements;
closely follow Rubric, and see my guide to making posters.
•
20 points | VIDEO | see examples in the left column on this webpage
Example videos may not satisfy all the requirements;
closely follow Rubric, and my guide to making videos.
To our shared folder, upload a folder with your name as follows: [yourname] - final poster and video and include in that folder four files named as follows:
(a) [My Name]-Poster.pdf <15MB
(b)
[My Name]-Video.doc - simply the URL for your Vimeo or YouTube video
(c) [My Name]-Video.mp4 <30MB using Handbrake (free app to reduce file size.
Review posters & videos (link) for more information.
|
 |